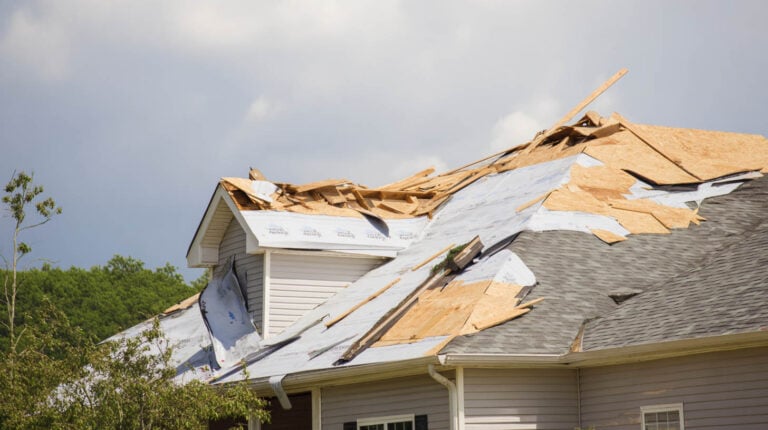
At Steadfast Roofing, we’ve developed a proven emergency roof tarping process designed to keep water out and protect your property from further damage. In Riverview, FL’s storm-prone climate, a correctly installed roof tarp can mean the difference between a minor inconvenience and significant structural repairs. Whether you’ve suffered storm damage, wind damage, or a fallen tree, our method ensures your home stays secure until permanent repairs are made.
Assessing Damage and Preparing the Area
Before starting any emergency roof tarping in Riverview or the surrounding Tampa Bay area:
- Inspect safely from the ground, using binoculars or a ladder with a partner for stability.
- Mark all damage points—including missing shingles, holes, cracked flashing, or exposed decking.
- Clear debris like branches, leaves, and granules so the tarp lies flat and seals effectively.
A clean, well-prepped surface is essential for a leak-proof temporary roof covering.
Choosing the Right Tarp and Fastening Tools
For storm damage roof tarping, the materials you choose can determine how well your home stays protected:
- Use heavy-duty, UV-resistant tarps (6 mil or thicker) to withstand Florida’s sun, wind, and rain.
- Apply outdoor-grade tarp tape for a waterproof seal at seams and edges.
- Select secure fasteners—roofing nails with washers, or smooth fender washers—to prevent the tarp from tearing in high winds.
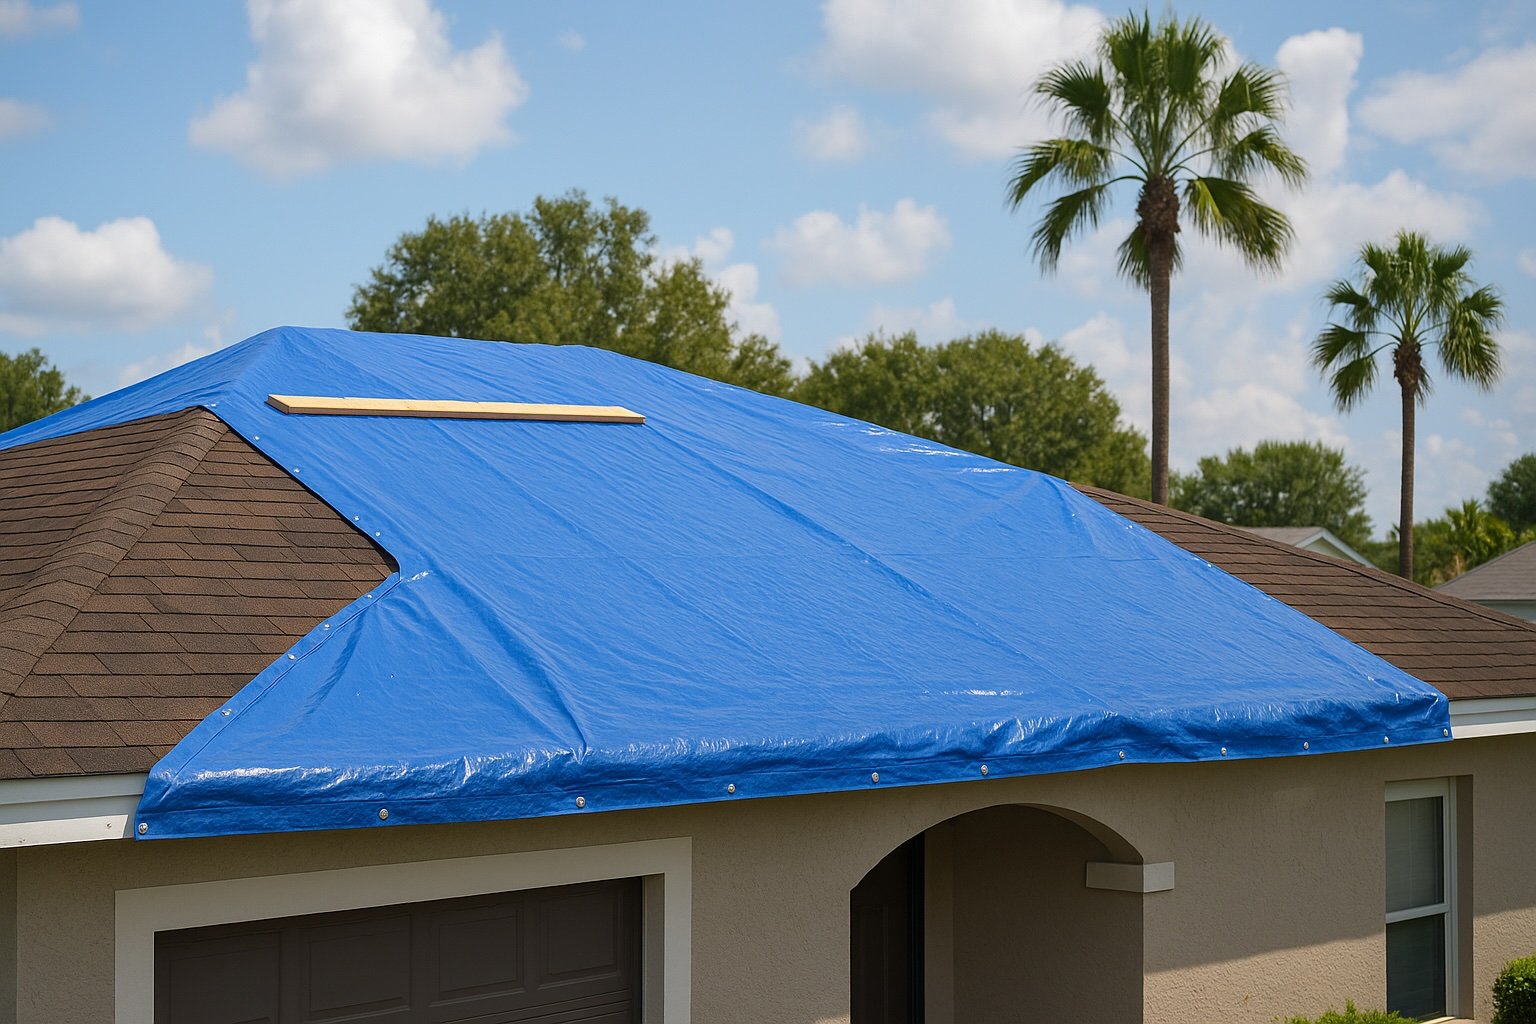
Cutting and Positioning the Tarp
When providing emergency roof tarping services:
- Measure the damaged area and cut the tarp to extend 2–3 feet beyond it in all directions.
- Begin positioning the tarp at the roof peak so it drapes evenly over ridges and valleys.
- Ensure it is centered and flat to avoid wind pockets or water pooling.
Securing the Tarp at the Ridge
To keep your tarp in place during intense Riverview storms:
- Fold over 6–8 inches of tarp at the ridge and apply a continuous bead of tarp tape.
- Align along the ridge, pressing firmly to bond.
- Nail every 12–16 inches through the fold and tape, capping each nail with a washer for a watertight seal.
Fastening Edges and Overhangs
When tarping a roof after storm damage:
- Extend tarp edges at least 12 inches beyond the eaves and rake edges.
- Fold under and secure with nails or washers, or tuck beneath drip edges for a clean finish.
- Add sandbags or secure the tarp to fascia boards to hold it snug in windy conditions.
Installing Tarp in Valleys and Around Penetrations
Special care during emergency roof tarping is needed for:
- Valleys—Press tarp tightly into the valley, tape to decking, and secure along edges.
- Roof penetrations—Cut X-shaped openings for vents or pipes, fold flaps over, tape edges, and secure with washers.
Sealing Seams and Reinforcing Edges
For larger damaged areas requiring multiple tarps:
- Overlap by at least 12 inches.
- Apply double-sided tarp tape underneath and single-sided tape on top of the seam.
- Repeat ridge-securing steps on each overlapped section for a continuous barrier.
Reinforcing with Protective Boards
For high-wind emergency tarping services in Riverview:
- Lay 1×6 or 1×8 pressure-treated boards perpendicular to the slope every 6–8 feet.
- Secure boards through the tarp into the roof decking.
- Use nails or screws with washers for extra hold and to prevent the tarp from lifting.
Conducting a Final Inspection
Before leaving a tarped roof:
- Check all seams, edges, and fasteners for security.
- Confirm washers are tight without damaging the tarp.
- Add reinforcement in wind-prone zones.
- Test with a garden hose to detect leaks before the next storm hits.
Long-Term Plan: Re-Tarping & Roof Replacement
Emergency roof tarps are temporary—here’s how to maintain them until repairs:
- Replace tarps every 30–45 days or after significant storms.
- Inspect weekly for loosened fasteners or damage.
- Document the installation with photos for insurance claims.
Safety & Best Practices
When performing any storm damage roof tarping:
- Wear safety harnesses and non-slip shoes.
- Avoid working alone, especially on steep or unstable roofs.
- Stop work if it starts raining to prevent accidents.
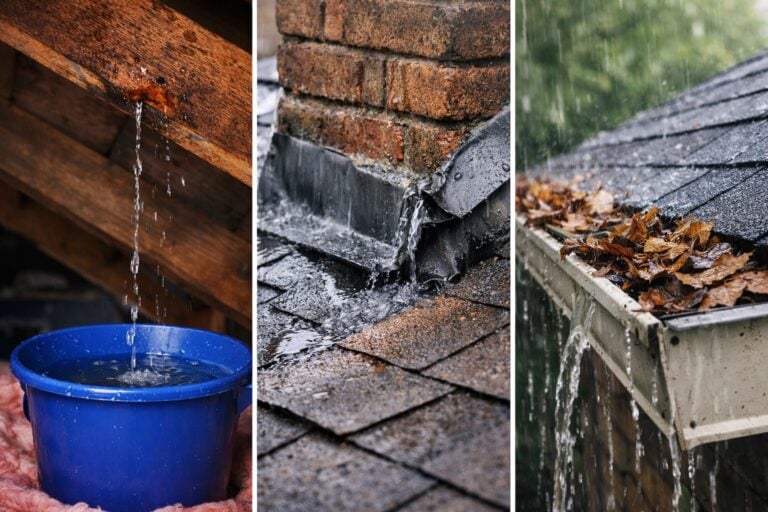
Why Proper Tarping Matters in Riverview, FL
Riverview and Tampa Bay homeowners face heavy rains, tropical storms, and hurricane threats. A poorly installed tarp can make water intrusion worse, leading to costly repairs.
At Steadfast Roofing, our trained crews follow strict safety and installation protocols—secure taping, strategic board placement, and durable fastening—to ensure your emergency roof tarp acts like a shield, not a flimsy cover. We provide quick response times and long-lasting temporary protection until your roof is fully repaired or replaced.
Read one of our latest blogs: “Minimum Roof Pitch: Optimal Standards for Durability & Safety”.